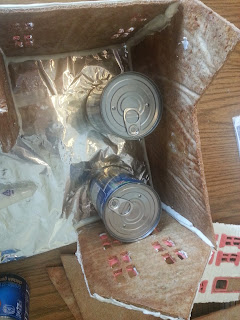
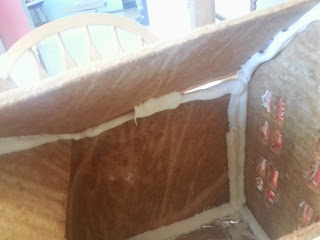
Then my coworker said that her daughter said, "It's not [gingerbuilder] creation, but it will do."
Only after that did I hear that the royal icing wasn't working out for her, so she HOT GLUED THE HOUSES TOGETHER! LOL!
I've had many people ask me if I'd be willing to help them with their first house. I, after all, had an amazing mentor, and would love to pay it forward to others. As I cannot make it into the hearts and kitchens of all of you, I will try and show you some basics.
Before we get specific, here are some general guidelines:
Get some friends to help and make a day out of it!
Scrounge up a stand mixer to make your life easier!
Read our blog for more about the process! Check out our tags for specific posts like: General Tips.
Click on the tag/label: "Tips and Tricks" (find it on the right side of our blog)
Remember: Gingerbread is the "forgiving art". There's nothing that more royal icing can't fix!
1. I cannot stress enough that you do some light reading. My book was Making Great Gingerbread Houses by Aaron Morgan and Paige Gilchrist. I actually just picked this book up again for some re-reading. Now that I'm more experienced in the process, I find that I get something different from the text and pictures. This books keeps me grounded in tried and true techniques and gives me tips to better my craft. I really recommend it.
2. Get a pattern. You can do a google search for a gingerbread house pattern and print one from the internet. Many of the books we've suggested in the blog also offer patterns in the back. 4 sides and a roof is all you need to start. Nothing fancy.
3. Get some recipes. Check out our RECIPES page for our favorite gingerbread and royal icing recipes. I have found MANY over the years and tried several. Regarding icing, it's just a game on the right ratio of powdered sugar to water. The weather will affect your icing when you make it, so keep that in mind and don't be afraid to veer a little from the original instructions.
**Remember that royal icing has NO FAT. No butter, none of that. You want this stuff to dry like cement!
4. Scour the candy aisles. Whatever is on sale, whatever you think will look cute. Be creative.
5. Bake your pieces. Make your gingerbread, follow the directions, and bake your pieces. I usually make this a 2 day process.
Day 1: Make the gingerbread and let it set up. Most recipes ask that the dough be cold, so I just stick in the fridge and come back to it in the next 1-3 days.
Day 2: Roll out the dough as evenly as possible, ON PARCHMENT PAPER, cut out the pieces and bake to a crisp. Then I let them cool for SEVERAL HOURS at least. I let them cool for a day at least. Once the pieces are baked, they can sit around for weeks (in a non-humid environment) and wait for assembly. If your pieces do start to absorb moisture, just throw them back in the oven at 325 degrees to dry them out.
6. Find a base that can contain your genius and creativity. Pizza boxes, cake boards, stiff paper plates (for smaller projects) all can work. Cover that base in aluminum foil, shiny gift wrap, or something. Now you have your canvas for creating.
7. Some people decorate their houses before assembly. This is something to try later. Odds are, if you're reading this "Basics" page, this is your first (or so) house. I vote you slap it up so you can get to the fun stuff--candy decorating! That being said, begin to assemble your house.
- Make sure you ice the bottom of your pieces as well as the sides. You want the walls to stick to your base and to each other.
- Hold your walls up with soup cans or anything you have handy and LET THEM DRY. Don't add the roof until the house is ready! While you're waiting, you can practice icing decorations on wax paper, make a tree out of an ice cream cone, whatever!
- When you attach the roof, ice the pitch of the house as well as the top of the wall. If your roof doesn't quite fit, don't worry about it. Fill in any holes with extra icing. Make it decorative :-)
8. Enjoy! I don't need to tell you how to decorate your house! Use your brilliance and creativity!
9. Brag. Yep. You did it. It didn't fall down. That's something to celebrate. Share your work of art on our blog! Post it all over social media.
You can have an original work of art for a holiday centerpiece in 9 easy steps...
or you can book a Gingerbuilder and let us do the work for you! Invite some friends and have a Gingerbread Party!


No comments:
Post a Comment